Now Reading: Easy Peanut Butter Easter Eggs (3 Ingredients, No Bake & Kid-Friendly)
-
01
Easy Peanut Butter Easter Eggs (3 Ingredients, No Bake & Kid-Friendly)
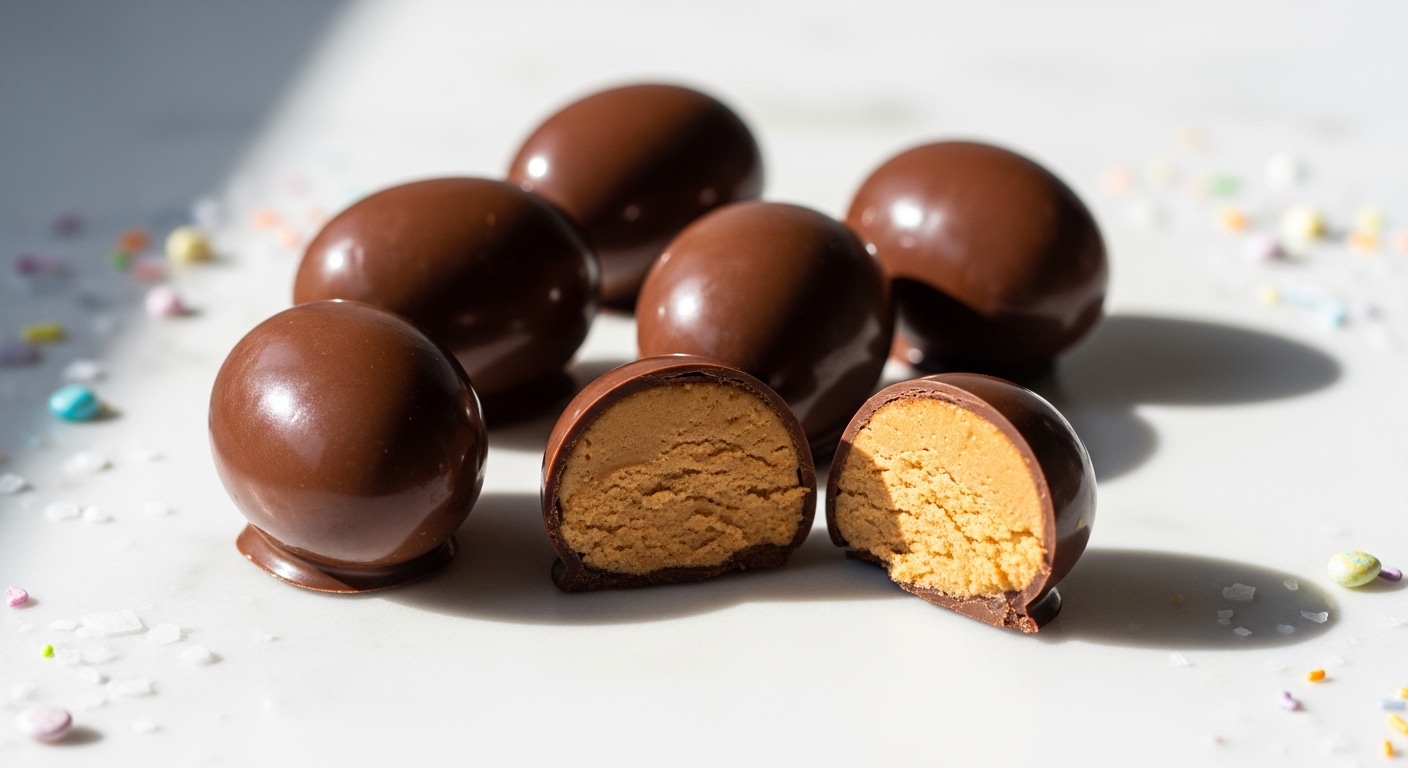
Make Easy Peanut Butter Easter Eggs with just 3 ingredients — no bake, kid-friendly, and ready in 30 minutes. Creamy inside, chocolatey outside, every time.
Introduction
Most store-bought peanut butter Easter eggs taste like sugary wax — and the homemade versions people share online aren’t much better. Grainy filling, chocolate that cracks the second you bite in, and a process so complicated it kills the fun before it starts.
You’ve tried melting chocolate before. It seized up. Or the filling was too soft to shape. Or the whole thing collapsed in your hands — and you had no idea what went wrong. That’s not incompetence. That’s a recipe that skipped the important parts.
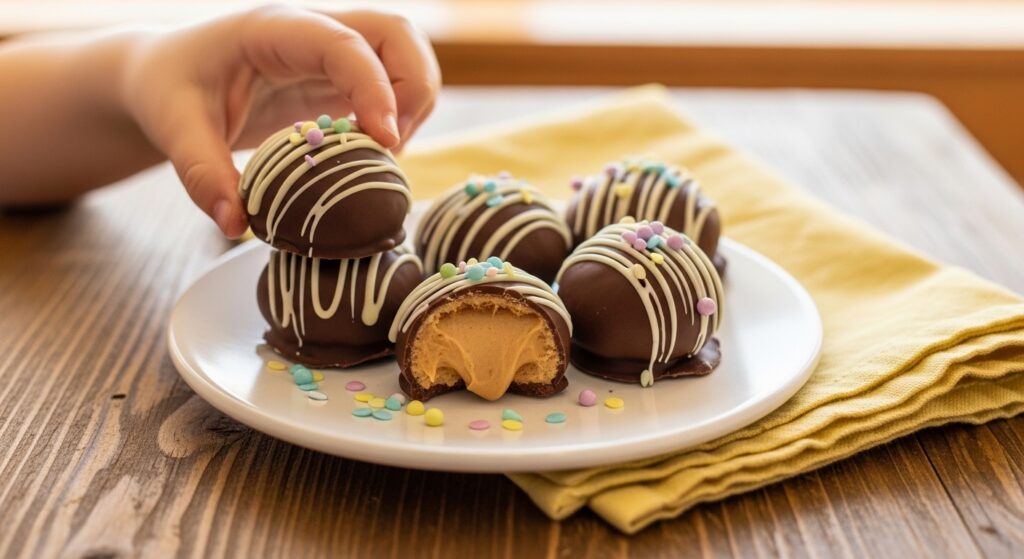
These Easy Peanut Butter Easter Eggs use 3 ingredients, require zero baking, and come together in under 30 minutes. The filling is dense, creamy, and holds its shape perfectly — and the chocolate shell snaps clean when you bite through it.
Quick Answer
Easy Peanut Butter Easter Eggs are made by mixing peanut butter, powdered sugar, and butter into a firm dough, shaping it into eggs, chilling until solid, then dipping in melted chocolate. No oven required. Three ingredients. The filling stays creamy inside while the chocolate sets into a glossy, snapping shell.
Why You’ll Love This Recipe
- Three ingredients — no pantry raid required. Peanut butter, powdered sugar, and butter are likely already in your kitchen, which means you can make these tonight without a single grocery run.
- The filling holds its shape without falling apart. The ratio of butter to powdered sugar creates a dough that’s firm enough to mold but soft enough to bite cleanly — no crumbling, no collapsing.
- Kids can make these from start to finish. There’s no heat involved in the filling process, which means children can mix, shape, and decorate without needing constant supervision or safety concerns.
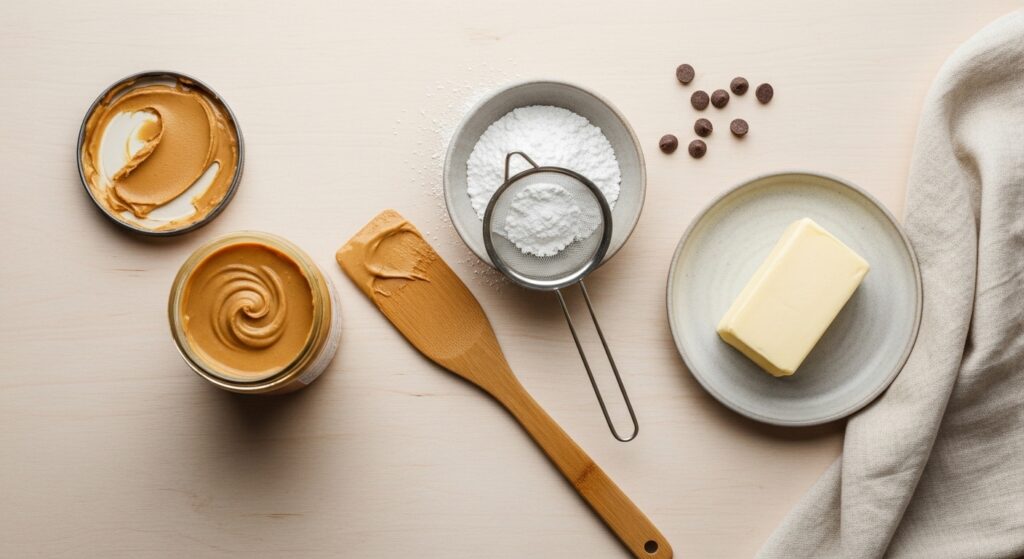
Ingredients List
Base Ingredients:
- Creamy peanut butter — 1 cup (260 g)
- Powdered sugar — 1½ cups (180 g), sifted
- Unsalted butter — 3 tablespoons (42 g), softened
Coating:
- Semi-sweet chocolate chips — 2 cups (340 g)
- Coconut oil — 1 teaspoon (5 ml) — for smoother melting
Optional Toppings:
- Flaky sea salt — for garnish
- White chocolate drizzle — for decoration
- Sprinkles — Easter themed
Just three core ingredients do all the heavy lifting here — everything else is optional but worth it.
Ingredient Notes & Smart Swaps
Peanut Butter: Use creamy, shelf-stable peanut butter — not natural or freshly ground. Natural peanut butter contains too much oil and makes the filling greasy and impossible to shape. Brands like Jif or Skippy work best because their oil content is stabilized.
Powdered Sugar: Sift it before mixing — unsifted powdered sugar creates lumps that never fully incorporate, leaving a gritty texture in the final filling. The amount controls firmness — add a tablespoon more if the dough feels too soft to hold an egg shape.
Butter: Room temperature butter blends seamlessly into the peanut butter without leaving streaks or uneven pockets. Cold butter resists mixing and creates a lumpy, uneven dough that’s harder to shape cleanly.
Chocolate: Semi-sweet chocolate gives the best balance — dark chocolate can overpower the filling, and milk chocolate makes the whole thing taste overly sweet. Adding coconut oil keeps the coating fluid and glossy after it sets.
Step-by-Step Instructions
- Mix the filling. Combine peanut butter, softened butter, and sifted powdered sugar in a large bowl. Mix with a spatula first, then use your hands — the dough will feel like thick, dense cookie dough and should hold its shape when pressed. (Pro Tip: If it feels sticky, refrigerate for 10 minutes before shaping — cold dough is far easier to handle.)
- Shape the eggs. Scoop about 2 tablespoons of dough and roll it into a ball, then gently press and pinch one end to form an egg shape. Place each one on a parchment-lined baking sheet. The surface should feel smooth and dry — not tacky.
- Chill until firm. Place the shaped eggs in the freezer for 20 minutes. They should feel completely solid — almost like a firm candy bar — when you press one gently. (Warning: Don’t skip this step — soft eggs will fall apart the second they hit the warm chocolate.)
- Melt the chocolate. Add chocolate chips and coconut oil together into a microwave-safe bowl. Microwave in 30-second intervals, stirring between each, until fully melted and glossy. The chocolate should flow easily off a spoon — thick like heavy cream, not stiff.
- Dip the eggs. Working quickly, drop one chilled egg into the chocolate, use a fork to coat it completely, then lift and tap the fork against the bowl edge to shake off excess. Place back on parchment. (Pro Tip: Double dip for a thicker shell — let the first coat set for 5 minutes before dipping again.)
- Set and decorate. Add flaky salt, sprinkles, or white chocolate drizzle before the coating sets — it firms up fast. Refrigerate for 15 minutes until the shell is completely solid and snaps cleanly.
Pro Tips for Perfect Results
Freeze, Don’t Just Refrigerate. The freezer is non-negotiable for the chilling step — refrigerator-cold eggs are still too soft and will deform when dipped. Twenty minutes in the freezer creates a filling firm enough to withstand the warm chocolate without losing its shape.
Use a Fork, Not Tongs. A fork lets excess chocolate drip through naturally, giving you an even, thin coating without thick pooling at the base. Tongs trap chocolate underneath and create an uneven, lumpy bottom that won’t sit flat.
Work in Small Batches. Dip 4-5 eggs at a time, keeping the rest in the freezer. Room temperature eggs soften within minutes — and a soft egg in warm chocolate is a disaster waiting to happen.
Common Mistakes to Avoid
Using Natural Peanut Butter. The excess oil in natural peanut butter prevents the filling from binding properly — you’ll end up with a greasy, shapeless mess instead of a firm, moldable dough. Stick to commercial brands for consistent results every time.
Skipping the Sifting Step. Powdered sugar straight from the bag contains lumps that don’t dissolve during mixing. Those lumps stay in the finished filling and create a gritty, unpleasant texture — 30 seconds of sifting completely eliminates the problem.
Overheating the Chocolate. Chocolate scorches fast — and scorched chocolate turns grainy and dull. Thirty-second microwave intervals with stirring in between keep the temperature controlled and the chocolate glossy and fluid.
Variations & Substitutions
Vegan Version: Replace butter with refined coconut oil and use dairy-free chocolate chips. Refined coconut oil has no coconut flavour — it mimics butter’s fat content and creates the same firm, cohesive dough without altering the taste.
Dark Chocolate Shell: Swap semi-sweet chips for 70% dark chocolate. The higher cocoa content creates a thinner, snappier shell because dark chocolate sets harder than milk chocolate — and the bitterness balances the sweet filling beautifully.
Crunchy Peanut Butter Version: Use crunchy peanut butter instead of creamy. The peanut pieces add texture contrast inside the smooth chocolate shell — and because the pieces are small, the dough still holds its shape without crumbling.
What to Serve With It
Arrange these alongside a bowl of mini chocolate eggs and jelly beans for a full Easter candy spread — the contrast of textures keeps the platter interesting. Pair with a cold glass of milk — the fat in milk cuts the richness of the chocolate coating and refreshes the palate between bites. For an Easter dessert table, stack them in a small nest made of shredded coconut dyed green — it takes two minutes and looks stunning.
Storage Instructions
Store finished eggs in an airtight container in the refrigerator for up to 2 weeks. Layer them between sheets of parchment paper — stacking without separation causes the chocolate coating to scratch and chip. Freeze uncoated filling eggs for up to 3 months — dip straight from frozen when needed. Here’s the hack nobody mentions: add a small piece of bread to the storage container — it absorbs excess moisture and keeps the chocolate shell from developing a white, chalky bloom over time.
Nutrition Facts (per serving)
| Nutrient | Amount |
|---|---|
| Calories | 210 |
| Protein | 4 g |
| Carbohydrates | 22 g |
| Fats | 13 g |
| Fiber | 1 g |
| Sodium | 85 mg |
| Key Vitamins/Minerals | Vitamin E, Magnesium, Iron |
FAQs
Can I make peanut butter Easter eggs without powdered sugar? Powdered sugar is what binds and firms the filling — replacing it is tricky. Honey makes the dough too sticky and wet to shape. If you need a lower-sugar option, reduce the amount by a third and add 2 tablespoons of cream cheese instead — it firms the dough without sweetness.
What makes peanut butter Easter egg filling too soft to shape? Soft filling usually means too much butter or warm ingredients. Refrigerate the dough for 15-20 minutes — cold dough firms up dramatically and becomes easy to mold. If it’s still soft after chilling, mix in an extra 2-3 tablespoons of powdered sugar until the texture holds an indent when pressed.
What chocolate is best for coating Easter eggs? Semi-sweet chocolate chips with a small amount of coconut oil give the best results — glossy finish, clean snap, and balanced flavour. Avoid chocolate melting wafers for this recipe — they set too fast and create a thick, uneven coating that cracks instead of snapping cleanly.
What is the secret to a smooth, lump-free chocolate coating? The key is temperature control — chocolate that’s too hot or too cool coats unevenly. Melt slowly in 30-second intervals and let it cool for 2 minutes before dipping. Tapping the fork firmly against the bowl edge removes excess and leaves a smooth, even surface every time.
Can kids help make these Easter eggs? Absolutely — the entire filling process involves no heat, making it genuinely safe for children to mix and shape independently. The chocolate dipping step requires adult supervision because the melted chocolate is hot. Kids can handle decorating — adding sprinkles or drizzling white chocolate — once the eggs are dipped and placed on parchment.
Conclusion
You wanted Easter eggs that actually deliver — creamy filling, snapping chocolate shell, and a process that doesn’t fall apart halfway through. These deliver exactly that, with just three ingredients and no oven required.
Now make them. Shape the filling cold, dip fast, and don’t skip the freeze. Did you go dark chocolate? Add sea salt? Drop a comment and tell me how yours turned out — or share this with someone who’s still buying the store-bought version. Try our Best Peanut Butter Cookie Recipe next — same bold flavour, completely different result.