Now Reading: High Protein Cadbury Egg Protein Balls (No Bake, 3 Ingredients & Kid-Friendly)
-
01
High Protein Cadbury Egg Protein Balls (No Bake, 3 Ingredients & Kid-Friendly)

Make high protein Cadbury egg protein balls with just 3 ingredients — no bake, kid-friendly, and ready in 15 minutes. The Easter treat that's actually good for you.
Introduction
Most Easter treats are just sugar dressed up in pastel colors — and protein ball recipes are somehow even worse. You get a chalky, dry lump that tastes like cardboard with a chocolate coating that cracks the second you bite into it.
You’ve tried the “healthy” versions. You measured everything perfectly. You chilled them for the full hour — and still ended up with something nobody wanted to eat twice. That’s not your fault. That’s a recipe that never worked from the start.
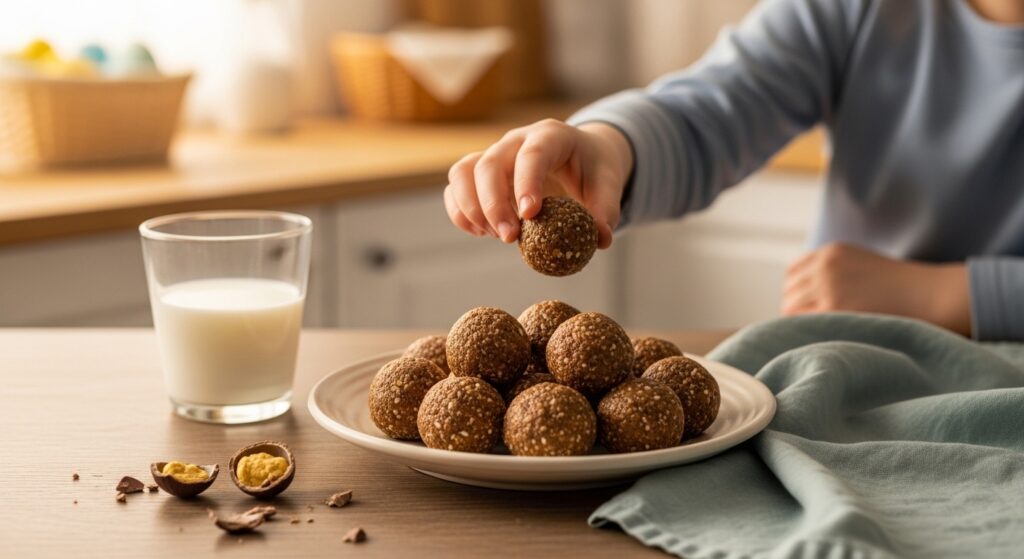
These Cadbury egg protein balls fix all of that. Three ingredients. No baking. A creamy, fudgy center with a glossy chocolate shell that actually snaps when you bite through it. High protein, genuinely satisfying, and ready in 15 minutes flat.
Quick Answer
Cadbury egg protein balls combine peanut butter, protein powder, and Cadbury Mini Eggs — rolled into balls and coated in melted chocolate. No baking required. Mix, roll, dip, and refrigerate for 20 minutes until set. Each ball delivers real protein with genuine Easter candy flavor. Done in 15 minutes of active prep.
Why You’ll Love This Recipe
- Three ingredients is all it takes. Peanut butter, protein powder, and Cadbury Mini Eggs come together into something that tastes far more complex than the ingredient list suggests. The result is a treat that genuinely satisfies both a sweet craving and a protein goal without compromise.
- Kids make these without any help. There’s no heat, no sharp tools, and no complicated technique — just mixing, rolling, and dipping. Children as young as five can handle every step independently, which makes this the Easter activity that actually produces something worth eating at the end.
- The macros are real. Each ball delivers between 8-10 grams of protein depending on your powder, with a fat and carb profile that keeps blood sugar stable rather than spiking it. You’re not eating a protein bar disguised as a treat — you’re eating something that genuinely earns both labels at once.
Ingredients List
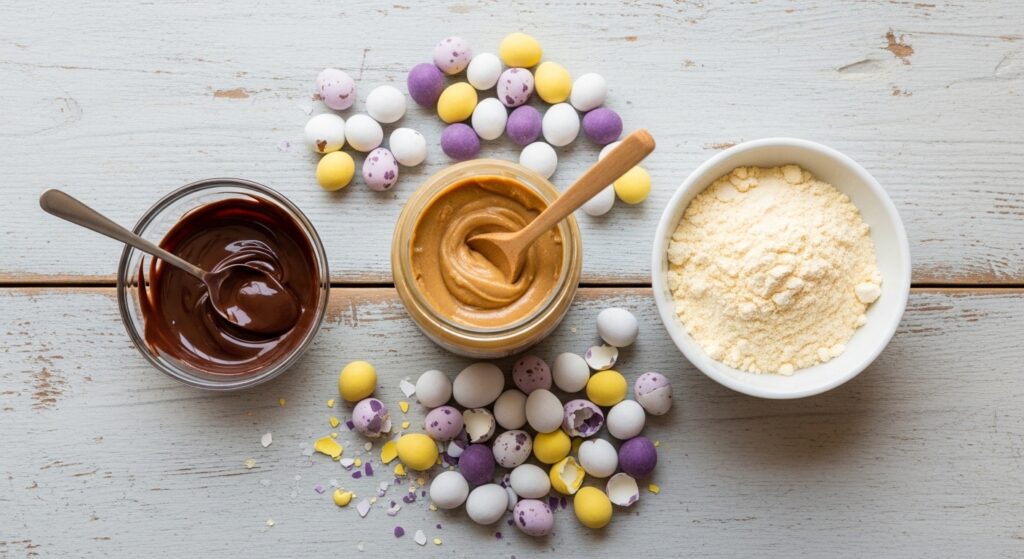
Base Ingredients:
- Natural peanut butter — 1 cup (250g), smooth
- Vanilla protein powder — ½ cup (60g)
- Cadbury Mini Eggs, crushed — ½ cup (80g)
Coating:
- Dark or milk chocolate chips — 1 cup (175g)
- Coconut oil — 1 tsp (for smoother melting)
Optional Add-ins:
- Rolled oats — 2 tbsp (for extra texture)
- Honey or maple syrup — 1 tbsp (if mixture is too dry)
- Sea salt flakes — pinch on top
- White chocolate drizzle for decoration
- Extra crushed Mini Eggs for topping
Three ingredients does the heavy lifting here — everything else is just making them yours.
Ingredient Notes & Smart Swaps
Peanut Butter: Use natural peanut butter with no added sugar or palm oil — the kind where the oil separates at the top. Stir it thoroughly before measuring. Conventional peanut butter contains stabilizers that make the mixture stiffer and harder to roll into smooth balls, which affects both texture and appearance.
Protein Powder: Vanilla whey works best because it blends smoothly and adds a subtle sweetness that reduces the need for extra sugar. Plant-based protein powder absorbs more liquid — if you use it, add one extra tablespoon of peanut butter to compensate, otherwise the mixture crumbles instead of holding its shape when rolled.
Cadbury Mini Eggs: Crush them while still in the bag using a rolling pin — you want a mix of fine powder and small chunks, not a uniform dust. The powder incorporates into the dough and adds flavor throughout, while the chunks create pockets of crunch that make every bite genuinely interesting.
Chocolate Coating: Adding one teaspoon of coconut oil to the melted chocolate thins it just enough to coat cleanly without pooling at the bottom. Without it, the chocolate sets too thick and uneven — the coating looks amateur and the ratio of chocolate to filling gets thrown off entirely.
Step-by-Step Instructions
1. Crush the Mini Eggs Place the Mini Eggs in a zip-lock bag and seal it tightly. Use a rolling pin to crush them firmly — you’ll hear the shells crack and feel the bag flatten under the pressure. Open the bag and check the texture: you want mostly small chunks with some fine powder mixed in. Set aside.
(Pro Tip: Freeze the Mini Eggs for 10 minutes before crushing — cold chocolate shatters more cleanly into distinct pieces instead of smearing into a paste.)
2. Mix the Base Combine peanut butter and protein powder in a large mixing bowl. The mixture will look crumbly at first — almost like wet sand — and then suddenly come together into a thick, Play-Doh-like dough as you stir. If it stays crumbly after 60 seconds of mixing, add one tablespoon of peanut butter and stir again.
3. Fold in the Crushed Mini Eggs Add the crushed Mini Eggs to the dough and fold them in with a spatula. The dough will turn speckled with color — pale purple, yellow, and pink fragments throughout. It should feel dense and slightly sticky, holding its shape when you press a small amount between your fingers without crumbling apart.
(Warning: Don’t overmix at this stage — the Mini Egg shell coating contains food coloring that bleeds into the dough if worked too aggressively, turning the mixture an unappetizing grey-brown color.)
4. Roll into Balls Scoop roughly one tablespoon of dough per ball and roll between your palms using firm, circular pressure. Each ball should be smooth and compact — about the size of a large grape. Place them on a parchment-lined tray as you go. Refrigerate the tray for 15 minutes until the balls feel firm to the touch.
(Pro Tip: Lightly dampen your palms before rolling — just a touch of water prevents the dough from sticking to your hands and gives you a cleaner, smoother surface on each ball.)
5. Melt the Chocolate Combine chocolate chips and coconut oil in a microwave-safe bowl. Microwave in 30-second bursts, stirring between each — the chocolate will look unmelted longer than you expect, then suddenly turn glossy and smooth. Stop microwaving the moment it’s fully liquid. Overheated chocolate turns grainy and won’t coat cleanly.
6. Dip and Set Drop each chilled ball into the melted chocolate and use a fork to lift it out, tapping the fork gently against the bowl edge to let excess chocolate drip off. Place back on the parchment tray. The coating should look thin, glossy, and even — not pooled or lumpy. Sprinkle crushed Mini Eggs on top immediately before the chocolate sets.
Refrigerate for 20 minutes until the shell is completely firm and snaps cleanly when bitten.
Pro Tips for Perfect Results
Chill the Dough Before Rolling If the dough feels too soft to roll cleanly, refrigerate the entire bowl for 10 minutes before portioning. Cold dough holds its shape during rolling and produces perfectly round balls instead of slightly flattened ones that look homemade in the wrong way.
Tap the Fork — Don’t Shake It When coating in chocolate, tapping the fork against the bowl edge removes excess chocolate far more effectively than shaking or spinning. Shaking introduces air bubbles into the coating that create a dull, matte finish instead of a smooth, glossy shell.
Room Temperature Peanut Butter Only Cold peanut butter straight from the fridge doesn’t incorporate with protein powder — it stays lumpy and refuses to bind. Let it sit at room temperature for 20 minutes before mixing. The dough comes together in half the time and rolls significantly smoother.
Common Mistakes to Avoid
Using the Wrong Protein Powder Casein protein powder absorbs liquid far more aggressively than whey, turning the dough into a dense, almost concrete-like mass that’s impossible to roll smoothly. Stick to whey or a light plant-based blend. If casein is all you have, cut the amount in half and add extra peanut butter until the dough reaches the right consistency.
Skipping the Refrigeration Step Rolling warm dough produces balls that flatten on the tray and lose their shape before the chocolate even goes on. The 15-minute chill isn’t optional — it’s what firms the fat in the peanut butter enough to hold the ball shape through the dipping process. Skip it and the whole batch looks like a tray of misshapen blobs.
Overheating the Chocolate Chocolate scorches at surprisingly low temperatures — especially in the microwave. Once it scorches, it turns thick, grainy, and refuses to coat smoothly no matter what you add to it. Always use 30-second bursts and stir between each one. Pull it out while it still looks slightly unmelted — residual heat finishes the job without burning it.
Variations & Substitutions
Almond Butter Version Swap peanut butter for almond butter in equal amounts. Almond butter has a slightly lower fat content than peanut butter, which makes the dough marginally firmer and easier to roll — especially useful in warm kitchens where peanut butter-based dough gets soft quickly.
Vegan Version Replace whey protein with a pea or rice protein blend and use dairy-free dark chocolate for the coating. Pea protein binds almost identically to whey in no-bake applications because both work through protein-fat interaction rather than heat — the texture difference is negligible and most people can’t tell the two apart.
Double Chocolate Version Add two tablespoons of unsweetened cocoa powder to the base dough and use white chocolate for coating instead of dark. The cocoa intensifies the chocolate flavor throughout the entire ball rather than just on the outside, which makes the Mini Egg crunch read as more prominent by contrast.
What to Serve With It
Fresh Strawberries — The natural acidity cuts through the richness of the peanut butter and chocolate combination, resetting the palate between bites so each ball tastes as good as the first.
Greek Yogurt Dip — A small bowl of vanilla Greek yogurt alongside these balls adds extra protein and a cool, tangy contrast that makes the whole plate feel more balanced and less like pure dessert.
To Drink: Cold milk — dairy or oat — is the obvious pairing and genuinely the best one. For adults, a cold brew coffee alongside these protein balls creates a bittersweet combination that makes both taste sharper.
Best Occasion: Easter baskets, post-workout snacks, kids’ party tables, or any afternoon when you want something sweet that won’t derail the rest of the day.
Storage Instructions
Refrigerator: Store in an airtight container for up to 7 days. Layer them between sheets of parchment paper — stacking them directly causes the chocolate coating to crack under the weight of the balls above, especially in warmer fridges where the coating stays slightly soft.
Freezer: Freeze in a single layer first, then transfer to a zip-lock bag for up to 2 months. Frozen protein balls are actually better than refrigerated ones — the texture firms up into something closer to an ice cream truffle, which most people prefer.
Reheating Hack: If the chocolate coating develops a white “bloom” after refrigeration — that chalky surface film — place the balls on a tray at room temperature for exactly 5 minutes. The bloom disappears as the fat re-tempers slightly, and the coating looks glossy again without any melting or recoating needed.
Nutrition Facts (per ball — based on 16 balls)
| Nutrient | Amount |
|---|---|
| Calories | 145 kcal |
| Protein | 8g |
| Carbohydrates | 12g |
| Fats | 8g |
| Fiber | 1g |
| Sodium | 55mg |
| Key Vitamins/Minerals | Magnesium, Phosphorus, Vitamin E |
Based on natural peanut butter, vanilla whey protein, and dark chocolate coating. Values are estimates. “All nutrition values are based on USDA food database.”
FAQs
Can I make Cadbury egg protein balls without protein powder? Yes — replace protein powder with an equal amount of almond flour or finely ground oats. Both bind the mixture through fat absorption rather than protein structure, so the texture stays similar. The protein content drops significantly without powder, but the flavor and shape hold up identically. Oats add a slightly chewier texture than almond flour.
Why are my protein balls falling apart? Crumbling almost always means the fat-to-powder ratio is off — too much protein powder and not enough peanut butter to bind it. Add one tablespoon of peanut butter at a time, mixing after each addition, until the dough holds its shape when pressed. Refrigerating the dough for 15 minutes before rolling also significantly reduces crumbling during the shaping process.
Can I use full-size Cadbury Eggs instead of Mini Eggs? Yes, but chop them finely rather than crushing — full-size Cadbury Eggs have a thicker shell and a fondant center that doesn’t crush evenly. Large chunks create structural weak points in the ball that cause it to crack when dipped in chocolate. Mini Eggs work better precisely because their size and uniform shell thickness distribute evenly throughout the dough.
How long do Cadbury egg protein balls last? Seven days refrigerated in an airtight container is the reliable window. Beyond that, the peanut butter starts to oxidize and the flavor turns slightly bitter. Frozen, they last two months without any quality loss. The chocolate coating actually protects the interior from freezer burn better than most no-bake treats, which is why freezing works so well here.
Can kids with nut allergies make these? Yes — swap peanut butter for sunflower seed butter in exactly the same amount. Sunflower seed butter has an almost identical fat and moisture content to peanut butter, which means the dough behaves the same way during mixing and rolling. The flavor is slightly more neutral, which actually lets the Cadbury Mini Egg flavor come through more prominently.
Conclusion
You now have everything you need to make Cadbury egg protein balls that actually taste like Easter and still hit your protein goals. The detail that makes the biggest difference? Freezing the Mini Eggs before crushing — it takes 10 minutes and completely changes the texture of every single ball. Make a batch this week and drop your results in the comments. And if you’re already planning your Easter spread, the Peanut Butter Easter Eggs recipe on recipedraft.com uses the same three-ingredient approach with zero baking required.